


Here's a guide to creating interactive product pages that facilitate the customer experience and help them make the right purchase choice
In today's digital landscape, having interactive product pages is vital for any marketing strategy. Interactive product pages provide a superior user experience, increase engagement, and drive conversions. They allow customers to explore products in a more immersive and engaging way, leading to a stronger emotional connection and a higher likelihood of purchase. By incorporating interactive elements such as 3D product configurator, virtual try-on, or augmented reality, businesses can provide customers with a deeper understanding and experience of their products. In a highly competitive e-commerce landscape, where customers have abundant choices, interactive product pages can be a powerful tool to captivate, convert, and retain customers. Therefore, investing in interactive product pages is crucial for modern marketing strategies to drive engagement, increase conversions, and ultimately achieve business growth.
However, achieving interactivity can be challenging, time-consuming, and costly due to technical implementation, compatibility and optimization issues, maintenance and updates, and associated costs. Despite the challenges, we’ll take some time to analyse the technology and tools to learn the best practices to make an interactive product page.
Step 0 : Know what your website needs
First you need to plan exactly what your website needs. Ask yourself why you should establish a process for creating interactive pages for your website?
You need to define the purpose of your interactive product pages. Do you want to help customers make a purchasing decision, enable them to personalize their product, or simply differentiate yourself from the competition? Product pages with interactive content offer significant advantages in terms of user engagement and reduced returns. According to a 2021 study, Interactive content generates 2x more conversion sand 4-5x more pageviews than passive content. But they also encourage sharing on social networks and virality. Together, these factors can help improve overall e-commerce performance, boosting sales, customer satisfaction and brand loyalty. Deploying an interactivity strategy across all products on your website makes sense for boosting production and thus reducing costs, as well as enabling visual consistency.
So identify the interactive elements you want to integrate into the page. This could include an interactive 3D viewer of your product, but also a configurator with option selectors, augmented reality, virtual try-on, and so on.
Step 1 : Creating the 3D assets

Gather all the resources you need : To create an interactive product page, you'll need resources such as product images, videos, technical data, graphics and so on. Make sure you have high-quality resources to provide an optimal user experience. You can obtain these assets from your internal database, from suppliers, or you can create them yourself.
The priority is to reuse existing assets: CAD files, 3D models used internally for design or communication, or models and textures created by external agencies.
If your interactive page involves configuration, option selectors or similar tools, you'll need to collect the necessary product data to make them functional. For example, if you have a cost estimating calculator, you'll need prices for the various options, calculation formulas and so on.
Now it's time to create 3D models for online use, based on your products and data. There are three ways to create these models :
- In-house via a team of 3D designers : It allows for better cost control without external fees or markups and ensures complete control over the creative process. But it may lack specialized expertise and slow down processes in the end.
- Using an external agency : They offer specialized teams with diverse skills and experience and have access to cutting-edge software tools and technologies. But hiring an external agency involves additional costs in the form of agency fees or project-based pricing. Furthermore, relying solely on an agency can create dependency, impacting project timelines if issues arise.
- By integrating an API : It offers streamlined development, access to powerful tools, scalability, flexibility, collaboration capabilities, and future-proofing. APIs simplify the process, provide essential functionalities, and enable marketers to deliver compelling and interactive product experiences without extensive technical expertise or resource investments. By leveraging an API, businesses can save time, scale their interactive product pages, collaborate effectively, and stay up-to-date with the latest advancements, ultimately driving engagement and conversions. Some of these solutions include instaLOD, Unity Forma or the 3D automation platform by Naker.
If you decide to start creating these assets from scratch, without 3D models or CAD, it's going to be a major undertaking. To create quality 3D web content, a dedicated article on our blog details the whole process in a simple and comprehensive way.
In conclusion, the choice between integrating an API, handling tasks in-house, or outsourcing to an external agency depends on the expected results and specific needs of each business. Careful consideration of the advantages and disadvantages associated with each option is essential to make an informed decision that best suits your unique requirements.
Now that you've got your assets, there's one last step : integration into an online viewer.
Step 2 : Embed of the interactive elements
In order to embed the interactive elements on your website you’ll need a 3D viewer and you’ll choose it according to your need for customization and your coding skills. Take a look at the following use cases to find out which one best suits what you want to do :
- 3D Model Viewer
There are various 3D viewer libraries and plugins available that can be integrated into your website. Some popular options include Three.js, Babylon.js, Sketchfab, and Verge3D. Research and select a 3D viewer solution that best fits your requirements. Set up the necessary infrastructure, such as a web server, to host your website and 3D assets. Download the chosen 3D viewer library and include it in your website's codebase. It's not always easy technically, depending on the CMS used, and the solutions are more or less easy to embed.
If you are looking for a Nocode solution, tools such as Naker.studio allow you to create and embed interactive product experiences at scale.
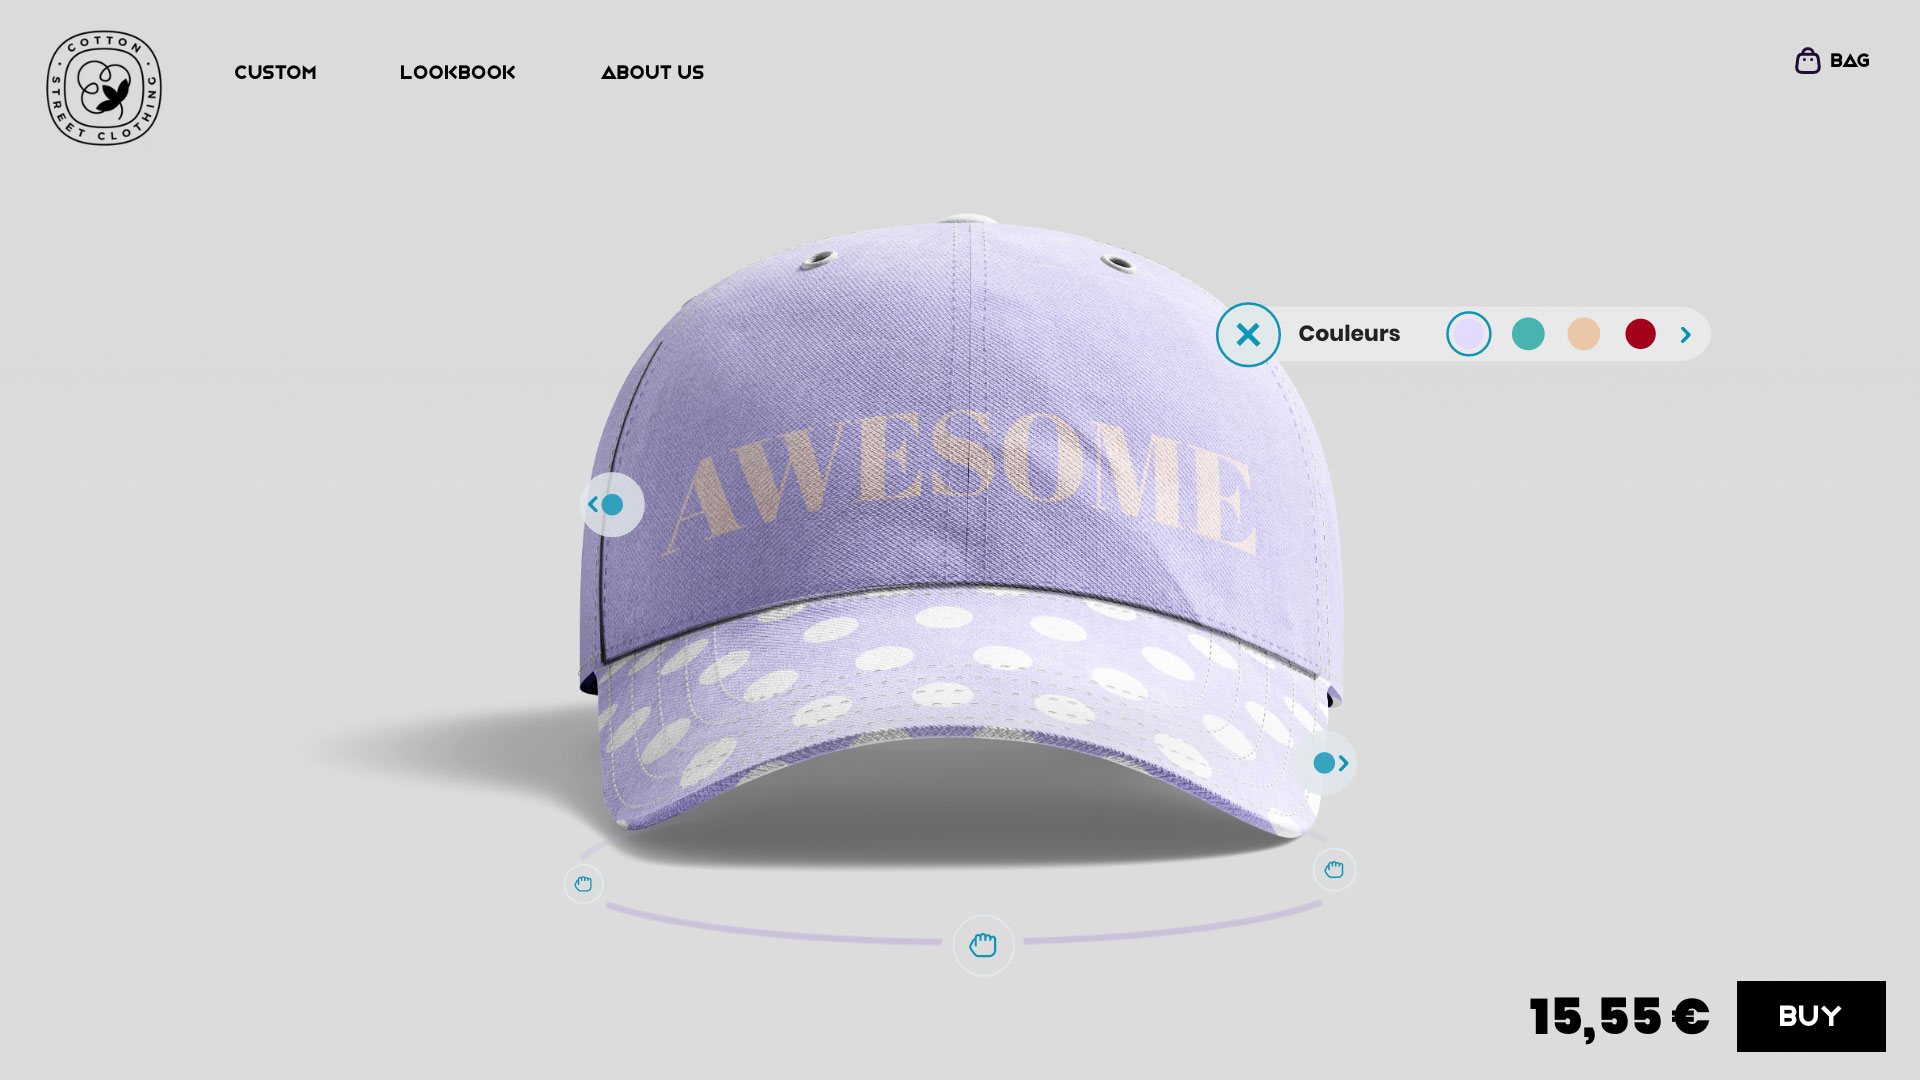
- 3D eCommerce configurator

The basis of a 3D configurator is a 3D viewer on which customizable parameters are implemented. You can design and set up the configuration yourself from scratch, but there are some really good tools that already exists to help you. Several choices include Threekit, Naker, Vectary, or Zakeke. These tools offer varying levels of customization, ease of use, and embed options. Consider your specific requirements, technical expertise, and budget when selecting the most suitable tool for your e-commerce website.
For your configurator to be operational, there are several parameters to take into account. To avoid the user having to start from scratch each time they visits the configurable product page, you may want to save previous configurations made by the user. You'll need to use scripts to retrieve the assets of the current configuration so that you can save it as a cookie. This also means displaying saved configurations on the product page.
For factories and order tracking, you'll need to compile a technical file summarizing the details of the user's configuration. When the order is placed in the shopping basket, and then paid for, the information from the configurator is used to generate the complete technical file, including order number, product size, quantity, etc. These type of features and many other are already included in the Naker viewer to facilitate any configurator integration!
- Virtual Try-on and Augmented reality

Virtual Try-On enables users to visualize products virtually, such as trying on clothes, accessories, or cosmetics, using AR technology. Research and choose an appropriate AR technology or platform that suits your requirements. Some popular options include ARKit (for iOS), ARCore (for Android), WebAR, and select an AR development framework or library that supports the chosen AR technology like AR foundation by Unity, Atomic Digital Design, or 8th Wall. Determine how users will interact with the AR elements, such as tapping or dragging on the screen, and define the actions they can perform, such as trying different products or adjusting settings.
Work with your web development team to integrate the AR technology into your product page. This typically involves embedding AR libraries or SDKs into the website code. Implement the Virtual Try-On functionality by integrating features like live camera access (if applicable), facial recognition, or body tracking, depending on the nature of the products. These features allow users to see themselves wearing or using the product virtually. Ensure the assets align correctly with real-world objects or surfaces. Finally make sure that users can easily transition from the AR experience to completing their purchase.
In the end, carefully test your website and 3D viewer across different devices and browsers to ensure compatibility and performance. Optimize your 3D models and code as needed to achieve a smooth and responsive experience. And finally don’t forget to do AB testing to measure the impact of 3D to see the conversion rate before scaling to all products in your website.
Now you have all you need to create beautiful interactive product pages on your website. And if you need an automated and internalized process to scale, feel free to contact us. We’ll be happy to help your business with our 3D automation platform.
More articles
Explore more


Fast-track your visuals production and product configuration
